I'm gearing up for one of my largest events tomorrow – my Crafting at the Lodge Spring Retreat!
This retreat theme is "Western" and I've rented a 10' U-Haul truck to transport the decor (on loan from a sweet friend – thanks, Kellie!) and stamping supplies to our retreat location. My retreat is a 10 hour day of pampering, inspiration, stamping, prizes, games and fabulous home cooked meals!
I'll be sharing pictures soon! Check out my Project PDF Tutorial library for some of the fabulous projects my customers are making!
Today's tutorial includes a fun technique called "Baby Wipe Swipe". Ohhh, that's a mouthful!
I've included the directions below for those of you on a mobile device. I also included a PDF tutorial if you'd like to save the directions for future use.
Enjoy and happy Friday – I'm off to pack the U-Haul truck!

Supplies:
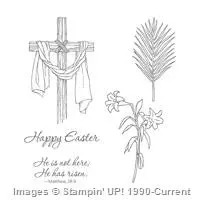
- Stamps – Easter Message (142987)
- Paper – Whisper White (100730), So Saffron (105118), Pool Party (122924), Blushing Bride (131198)
- Ink Pads – Basic Black Archival (140931)
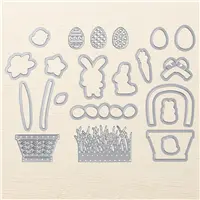
- Other – Big Shot (143263), Magnetic Platform (130658), Basket Builder Framelits (143228), Ink Refills: Pool Party (122933), Blushing Bride (131157), So Saffron (105225), Stampin’ Dimensionals (104430), Stampin’ Write Basic Black Marker (100082), Metallic Enamel Shapes (141678), Clear Wink of Stella (141897, Baby Wipes
Measurements
- So Saffron (base) – 4 ¼” x 11”, folded in half
- So Saffron (strip) – 1 ¼” x 4 ¼”
- Pool Party – scrap
- Blushing Bride – scrap
- So Saffron – scrap
- Whisper White (layer) – 4” x 5 ¼”
Instructions:
- Fold a baby wipe into a square and add several drops of the three (3) ink refills on the fold, leaving space between each color.
- Pull/swipe the baby wipe diagonally across the white cardstock layer as shown. First in one direction and then the other to create a plaid. Let dry. Adhere to the card base.
- Die cut three bunnies using the framelits, one from So Saffron, Pool Party and Blushing Bride.
- Create the eyes and nose on each die cut bunny using the black marker.
- Stamp the greeting on the So Saffron strip using black ink. Adhere the strip approximately ¾” of inch from the bottom of the white cardstock layer as shown.
- Adhere the 3 bunnies using Dimensionals so portions of their bodies are overlapping on the So Saffron strip.
- Add silver Metallic Enamel Shapes randomly on the card base.

Place an online product order of $25 or more and enjoy your exclusive invitation to a live event that includes demonstrations, product Prize Patrol and a bundle of tutorials – all free as my thank you! Read all about my Live with Lisa events HERE.
Read all about my REWARDS program HERE.