Join me TOMORROW, Saturday, February 4th at 8PM EST – 5PM PST – 6PM MST – 7PM CST for a live demonstration on my Facebook page HERE.

Be sure to "like" my Facebook page so you don't miss the notifications!

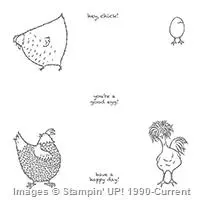
There's one Sale-A-Bration stamp set that's been wildly popular!
It's the stamp set "Hey, Chick". I think it's because of that crazy looking chicken with the tussled hair. It's not only different but funny. It was the first stamp set I 'had to have' during Sale-A-Bration.
And I've put it to good use! This is just one of the many creations with this stamp set that you'll see.

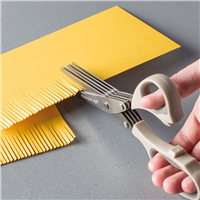
I've talked about the Fringe Scissors numerous times before. I even made a quick tip video about them which you can watch by clicking HERE.
Gone are the days that we have to create small snips with our scissors to resemble blades of grass. These scissors do the work for you. In addition to replicating grass, they are great for creating fringe layers for your cards. You'll see an example of that in the video.
I've included the tutorial information below for my mobile device users and also a document tutorial for those that wish to save the project to their computers.
I think you'll admit that this stamp set can be lots of fun to use!
Remember, Sale-A-Bration ends on March 31st. Get all the details about Sale-A-Bration and view your free selection choices by clicking HERE or on the image below.


Supplies:
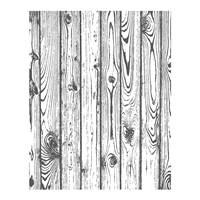
- Stamp Sets – Hey, Chick (143328 wood, 143331 clear); Hardwood (133032 wood, 133035 clear)
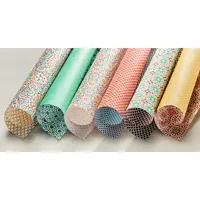
- Card Stock – Whisper White (100730); Early Espresso (119686); Basic Black (121045); Cajun Craze (119684); Crumb Cake (120953); Pumpkin Pie (105117); Moroccan Designer Series Paper (141645)
- Stamp Pads – Basic Black Archival (140931); Early Espresso (126974)
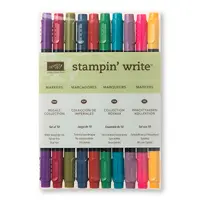
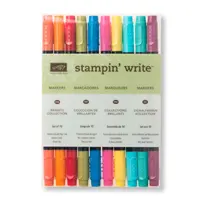
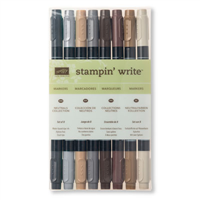
- Misc. – Brights Stampin’ Write Markers (131259); Basic Black Stampin’ Write Marker (100082); 5/8” Burlap Ribbon (141487); Fringe Scissors (133325); Dimensionals (104430); Fine-Tip Glue (138309); Tear & Tape (138995); Pencil
Measurements:
- Cajun Craze (base): 5 ½” x 8 ½”, folded in half
- Designer Paper: 2” x 4 ¼”
- Whisper White: 2” x 2”
- Early Espresso: ¾” x 2”
- Basic Black: 2 ½” x 2 ½”
- Crumb Cake: 1 ½” x 3”
- Ribbon: 5” & 8”
Instructions:
- Adhere the designer paper to the bottom of the card base.
- Adhere the 5” piece of burlap ribbon above the designer paper using Tear & Tape. Once adhered, trim the ends using your scissors.
- Use the Fringe Scissors on the Crumb Cake cardstock to represent blades of straw.
- Stamp the Early Espresso cardstock using the Hardwood stamp in Early Espresso ink. The easiest way is to ink the stamp, face up on and lay the Early Espresso cardstock on top. Place a piece of scratch paper over the cardstock and rub. This will transfer the image from the bottom up, eliminating lifting the large stamp or dirtying your hands. Adhere several pieces of the Crumb Cake ‘straw’ to the backside.
- Hold the Early Espresso cardstock over the white cardstock square. Use a pencil to make a small mark where the egg/chick should be stamped so it will be properly aligned.
- Stamp the egg/chick image on the white cardstock layer using black ink. Color in the chick using the Daffodil Delight marker. Stamp the greeting above the chick using black ink.
- Adhere the Early Espresso cardstock strip to the white cardstock layer.
- Pull two individual strands of burlap from the 8” piece. Wrap it around the Early Espresso cardstock strip, as shown, ending in a knot in the front.
- Cut a small triangle from the Pumpkin Pie cardstock to represent a beak. Adhere the beak using Fine-Tip Glue to cover the crack in the image. Use the black marker to create two eyes above the beak.
- Adhere the white cardstock layer to the black cardstock using Dimensionals. Adhere the layers to the card base using Dimensionals.

Monday is the final day to order your Studio Stamps in the Mail for February! See the cards and get the details by clicking HERE or on the image below.


This card and stamp set is too cute. Will select it with my next order.
Aww, thanks, Loretta. This stamp set is a winner. The images are cute and different and appropriate for anyone and any occasion. 😀 Thanks for stopping by and leaving me a comment. I appreciate the feedback!