Impressive and gorgeous is the best way to describe the resist technique.
Learn how sponge daubers and clear embossing powder work together to create this elegant card.
I've included the tutorial below for those using a mobile device. I've also included a PDF tutorial if you'd like to save it for future inspiration.
Enjoy!

Supplies:
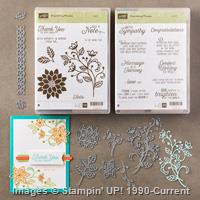
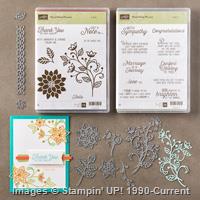
- Stamp Sets – Flourishing Phrases (142322 wood, 142323 clear); One Big Meaning (138788 wood, 139420 clear)
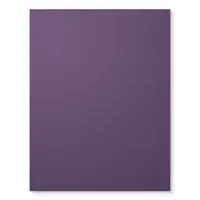
- Cardstock – Whisper White (100730); Elegant Eggplant (105126); Silver Foil Sheets (132178)
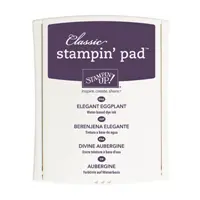
- Stamp Pads – Elegant Eggplant Stampin’ Pad (126969); Daffodil Delight Stampin’ Pad (126944); Mint Macaron Stampin’ Pad (138326); Basic Black Archival Stampin’ Pad (140931); VersaMark (102283)
- Misc. – Mint Macaron 3/8” Sheet Linen Ribbon (141656); Sponge Daubers (133773); Stitched Shapes Framelits Dies (145372); Layering Circles Framelits Dies (141705); Heat Tool (129053); Clear Stampin’ Emboss Powder (109130); Stampin’ Trimmer (126889); Stampin’ Dimensionals (104430); Big Shot Die-Cutting Machine (143263); Magnetic Platform (130658), Tissue
Measurements:
- Whisper White (base) – 5-1/2” x 8-1/2”
- Whisper White (layer) – 4” x 5-1/4”
- Elegant Eggplant – scraps
- Whisper White – scraps
- Silver Foil – 3/8” x 2-1/2”
- Ribbon – 3-3/4”
Instructions:
- Ink the flourishing floral image using VersaMark ink. Stamp the image on Whisper White layer. Cover the image with the embossing powder. Lightly tap off the excess. Heat set using the Heat Tool. Let cool.
- Use a separate sponge dauber (Elegant Eggplant, Mint Macaron and Daffodil Delight) for each color. Tap the dauber lightly onto the ink pad, rub some of the ink off onto a piece of scrap paper. You want to make sure the color isn’t too strong. You can always go back over it a second time if you decide you want more color. Add the ink to the embossed image using a soft, circular motion. The embossed areas will resist the ink. Once finished, use a tissue and rub in small circular motions over the embossed image. This will remove ink from areas it will not dry and eliminate any smudging.
- Cut one end of the ribbon on an angle. Adhere the ribbon to the Whisper White layer, adhering the other raw end behind the layer. Adhere the layer to the card base.
- Stamp the greeting using black ink on Whisper White scraps. Cover the image with clear embossing powder. Lightly tap off the excess. Heat set using the Heat Tool. Let cool. Die cut using the appropriate size circle from the Stitched Shapes Framelits.
- Die cut a circle slightly larger than the one for the greeting using Elegant Eggplant scraps and the Circle Framelits.
- Cut an angle on both ends of the silver foil strip. Adhere the silver strip behind the Whisper White greeting. Adhere the Elegant Eggplant circle to create the layer shown.
- Adhere the layered circles over the top of the ribbon. Adhere the layers to the card base using Dimensionals.

Tomorrow is the final day to place your $25 product order to receive a private invitation to join my Live with Lisa event tomorrow. Click HERE for details.


Love this card. You say to stamp the image on whisper white scrap, should this not be stamped on the whisper white layer. I would like to make this for an Raster card.
Beautiful card, Lisa. I love the big thank you with the colorful flourish and ribbon. Thanks for the PDF for it. Have a great day!
Good catch, Clara! Thank you for calling that to my attention. I’ve corrected that here on the blog post as well as the PDF. I appreciate you letting me know. Have a great weekend!
Hi HJ! Thank you for coming by today. I always enjoy “seeing” you! 😀 Enjoy your weekend as well.
So perfect! Have to catch my breath:). Thank you so much for sharing.
You’re too cute, Trish! Thanks for stopping by.