What could be better than a blinged out birdcage?
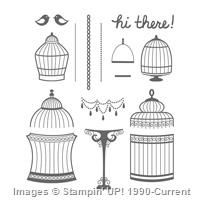
The versatility of the new Builder Birdcage stamp set has my creativity going wild!
The set includes different birdcages, chains, birds and a beautiful vintage looking stand. You know I love vintage!
This card was so easy to create yet stunning to look at. The stamping is done right on the designer paper. The layered greeting adds to the vintage frilly flair.
I'm including a PDF tutorial below for you to download. I've also pasted the instructions for those on a mobile device.
Give this new Occasions Catalog stamp set a look. You'll find it on page 36. The 16 photopolymer pieces are easy to align and it's only $17.00!

Supplies:
- Stamp Sets –Builder Birdcage (142891)
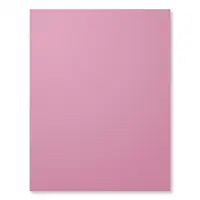
- Cardstock –Very Vanilla (101650); Sweet Sugarplum (141418); Basic Gray (121044)
- Stamp Pads – Memento (132708); Basic Gray Archival Stampin’ Pad (140932)
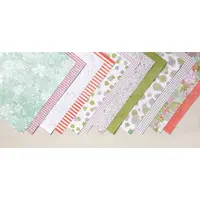
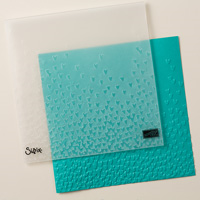
- Misc. – Succulent Garden Designer Series Paper (142778); Big Shot (143263), Magnetic Platform (130658), Layering Ovals Framelits (141706); Falling Petals Textured Embossing Folder (142761); Rhinestone Basic Jewels (119246); Stampin’ Dimensionals (104430)
Measurements:
- Sweet Sugarplum cardstock (base): 5 ½” x 8 ½”, folded in half
- Very Vanilla cardstock (layer): 5 1/4” x 4
- Very Vanilla cardstock: scrap for sentiment
- Basic Gray cardstock (panel): 2 ½” x 5 ¼”
- Basic Gray cardstock: scrap for scallop oval
- Designer Paper (gingham pattern): 2 ¼” x 5 ¼”
Instructions:
- Emboss Very Vanilla layer using the embossing folder. Adhere it to the front of the card base.
- Stamp the images for the birdcage using Memento ink on the designer paper. TIP: Start with the images from the bottom and work your way up as shown.
- Adhere the designer paper to the panel. Adhere the layers to the Very Vanilla cardstock.
- Stamp the greeting using Basic Gray ink on a scrap of Very Vanilla cardstock. Die cut the greeting using the ovals framelit that measures 2 ¼”.
- Die cut one scallop oval using a scrap of Basic Gray cardstock. Use the scallop oval measuring 2 3/8”.
- Adhere the Very Vanilla greeting layer to the Basic Gray scallop oval. Adhere the greeting layers to the card using Dimensionals.
- Add rhinestones to the bottom of the birdcage as shown.


Really cute, blinged out bird cage, Lisa. I love the black on the gingham paper. Very simple but comfy, cozy as if you were dropping by to say hi to a friend. Very sweet. Have a great day!
Good morning, HJ! It’s always nice to hear from you! So glad you enjoyed the project. I really love this stamp set. 😀 Have a great weekend.