Mark your calendar for TOMORROW, Saturday, March 4th * 8PM EST – 5PM PST – 6PM MST – 7PM CST!
I will be LIVE on my Facebook page providing a project demonstration, tips and interactive fun!
Click HERE or on the image below to 'like' my Facebook page so you don't miss the notifications.
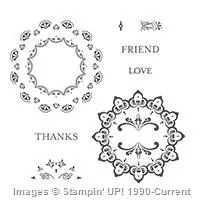
Today's tutorial project includes one of the new Sale-A-Bration products, Make a Medallion. Choose this stamp set or any one of the other limited edition products available during Stampin' Up!'s largest sale of the year – but only through March 31st. Details HERE.
This photopolymer stamp sets allows you to stamp multiple images inside one another creating endless possibilities.
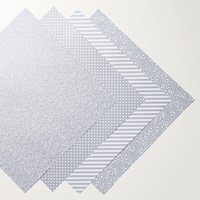
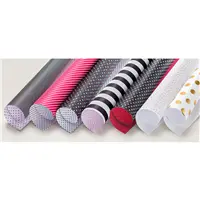
Couple the images with designer paper strips (a great way to use up your scraps!) and the beautiful Sale-A-Bration Metallic Ribbon, you'll have a striking card!
I'm including the directions below for those of you on a mobile device. The PDF tutorial can be downloaded if you'd like to save it for future inspiration.
Just a few more days to order your Studio Stamps in the Mail for March!
See the products and the cards in a short video introduction HERE or click on the image below.
Tutorial Directions
Supplies:
- Stamp Sets – Make a Medallion (143274 – Sale-A-Bration 2017)
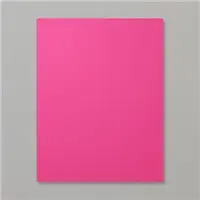
- Paper – Melon Mambo (115320); Whisper White (100730); Basic Black (121045); – Neutrals Designer Paper Stack (138435); Pop of Pink Specialty Designer Series Paper (141648)
- Ink – Archival Black Stampin’ Pad (140931); Melon Mambo (126948)
Misc. Classic Label Punch (141491); Rhinestone Basic Jewels (119246); 3/8” Metallic Ribbon Combo Pack (143601 Sale-A-Bration 2017); Stampin’ Dimensionals (104430)
Measurements:
- Melon Mambo (base): 5 1/2” x 8 1/2”, folded in half
- Melon Mambo: scrap for greeting
- Whisper White (layer): 2 ¾” x 2 ¾”
- Basic Black (layer): 3” x 3”
- Basic Black (strip): 1 ¾” x 5 ½”
- Pop of Pink Designer Paper: 1 ½” x 5 ½”
- Neutrals Designer Paper (script pattern): 1” x 5 ½”
- Silver Metallic Ribbon: 7”
Instructions:
- Using black ink, stamp the medallion image shown down the right side of the card base. TIP: Start by stamping the middle image first and then stamping the other two. This will make for easier placement.
- Adhere the Pop of Pink designer paper to black cardstock strip. Be careful to center it horizontally.
- Adhere the script pattern designer paper on top of the pink designer paper as shown. Be careful to center it horizontally.
- Adhere the ribbon to the three layers of designer paper/cardstock by placing adhesive on the back of the black cardstock strip at the top and at the bottom.
- Adhere the layers to the card base as shown.
- Using the same medallion stamp, stamp one medallion in the center of the white layer using black ink.
- Stamp the greeting onto a scrap piece of Melon Mambo using black ink. Punch out using the Modern Label punch.
- Using Melon Mambo ink and the second medallion stamp, align this image over the black medallion and stamp on the white layer as shown.
- Adhere the white layer to the black layer. Adhere the layers to the card base using Dimensionals.
- Adhere the greeting across the center of the stamped medallions using Dimensionals.
- Add a rhinestone to each side of the sentiment as shown.


