Today's the final day to enter my birthday giveaway.

I will select a random winner to choose ANY TWO (2) Project PDF Tutorials from my library for free! My Project PDF Tutorials include multiple pictures, step-by-step instructions, cutting dimensions and a complete supply list.
Here's how to enter:
- Leave me a comment telling me which stamp set or bundle in the current annual catalog is your favorite and why.
- Comments/entries must be received no later than Thursday, July 27th at 11:59pm EST.
- Be sure to check back here on Friday, July 28th when the winner will be posted. If you're been randomly selected, you have until Monday, July 31st to email me to tell me which TWO free PDF Tutorials you would like.
- There are over 40 Project PDF Tutorials to choose from. The selections can be found HERE.
- Everyone is eligible, whether you live in the U.S. or not.

 13 states will be enjoying free sales tax in preparation for back to school supplies. Stampin' Up! has provided a comprehensive list, by state, that include tax free items on adhesives, Dimensionals, Paper Snips, glues, clips, markers, Blender Pens and more!
Sales tax dates vary by state so take a look at the entire list by clicking on the image above.
Today is week 3 in my series on Embossing Paste. Did you miss the first two weeks?
- Click HERE to view the Embossing Paste 101 Quick Tip video
- Click HERE to view the Embossing Paste Coloring Quick Tip video
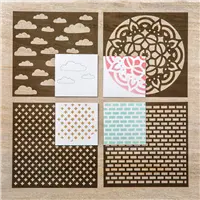
- Click HERE to learn how to make your own stencil/mask
This week I will be teaching you how to add color to the cardstock before the Embossing Paste is applied. The white texture paste is slightly opaque which allows hues of the ink to show through. The result is a stunning background!
During this series, I'm not only demonstrating tips on the Embossing Paste but I am also providing a completed card sample. Don't forget to scroll down to see it, along with the supplies I've used.

Using a sponge you will apply ink with random color to the Whisper White cardstock base. This one measures 4" x 5 1/4". I added an extra layer of white cardstock measuring 4 1/8" x 5 3/8" behind it before adding it to the card base measuring 5 1/2" x 8 1/2".
Don't miss the speckle technique I used on the background to give it that extra texture.

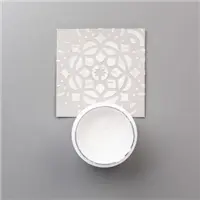
Lay the mask/stencil over the sponged cardstock and apply the Embossing Paste. Be sure to allow the paste to dry. Thicker applications will require longer drying time.

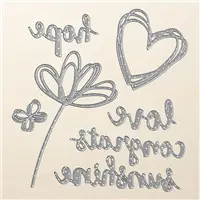
I die cut the word "sunshine" from the Sunshine Wishes Framelits and adhered it to the card base using Mini Dimensionals which I trimmed smaller to fit.

Pearls were colored with a pastel Sharpie marker.

You've been waiting and it's BACK! The long awaited Daisy Punch is back in stock and NOW is the time to grab it!
And, I've got a great BONUS for you!
Click on the image below for details.


Spend $50, get $5 to use in August. Details HERE.
Shop in my online store and receive additional REWARDS.


My fab right now is the Coffee Cafe. I have a ladies coffee group I belong to that these cards are perfect for. Love the cards you’ve designed using this set! Would love to get your tutorial.
A very Happy Birthday to You! Your blog is such a great inspiration and I enjoy receiving it.
Happy birthday, Lisa! I really love this card and plan to do a workshop using the embossing paste technique!! Thanks for sharing your creative talent so freely….you have inspired and challenged me many times. My favourite set is the Eastern Palace. I’ve had so much fun playing with it!!
I like this embossing technique the best, Lisa. I’ve not seen or used embossing paste yet and wonder how it holds up on a card after going through the mail–any experience with that yet?
Hope your birthday was fantastic!
cj
The sponged embossing paste one really caught my eye. I loved the colors you used and definitely will be trying this technique.
Happy belated birthday Lisa. Hope you had a fabulous day!
I love the current “Coffee Cafe” stamp set and bundle with the framelits and the DSP, also the die cut out tags. These products could be used for many different occasions like birthdays, friendships, teacher gifts, thank-you’s and many more.
As everyone enjoys coffee regularly/daily whether it is hot or cold. It’s a good caffeine fix for most of us and also a good
“Pick me Up” when you are feeling down. Really who doesn’t like coffee?
I would like to win your PDF Tutorials, you are a great inspiration to many craft like minded people.
Thank you.
Wow those are great cards and tips!! Thanks for sharing!
Happy Birthday also!!
Happy Birthday!!! My favorite stamp set is Cafe Coffee.
Happy birthday! I seriously love your style! My current fave is Colorful Seasons…so versatile!
Thank you, Lisa! This technique is absolutely stunning and one I will definitely be creating. My favorite stamp set is Seaside Shore which works well for a man card.
I can’t wait to try your overlay technique tomorrow! My favourite set right now is Colourful Season, I love the Muskoka chair in the set!
Belated happy birthday, Lisa! Hope you had a wonderful celebration with your family.
The Daisy Delight suite immediately caught my eye, but, as a breast cancer survivor, Ribbon of Courage with the coordinating Framelits is my favorite.
Love your embossing paste videos.
Belated Happy Birthday! Hope you had a wonderful day!