Bob the Builder and I have been blessed to be able to travel to many amazing places over the past 19 years with Stampin' Up!. Their annual incentive trip is always something I work hard to achieve. This year's trip was to Thailand. Unfortunately, the surgery I had in May prohibited me from traveling so we had to cancel. I loved following my stamping friends on social media and seeing the trip through their eyes – and disappointed that I couldn't be there.
During one of my "Debbie Downer" moments I created this card. I imagine the sunsets in Thailand were breathtaking!

I've always been inspired by sponge art so I thought I'd give it a try.
I punched a 1 3/4" circle from a Post-it-Note for the sun. Be sure to place a piece of cardstock behind the Post-it-Note so that it punches clean. I used a second Post-it-Note to mask off the area where I wanted the skyline. I used a wedge of a Stampin' Sponge for each color.
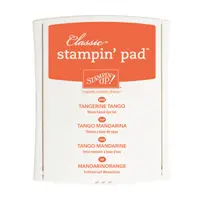
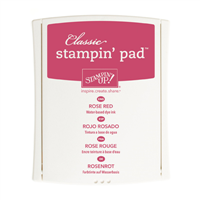
I started with Daffodil Delight then added Crushed Curry, Tangerine Tango and Rose Red. I sponged right over the masked sun, protecting it from all the layers of color I was applying.
A separate sponge was used to add a little black for a hill over the left side of the flamingo. Well, it was my attempt at a hill. ((smile))

I removed the Post-it-Notes along the skyline and added new ones (Don't reuse them. I tried. Epic fail. I was careful to allows a teeny tiny area of the sky to overlap into the water.
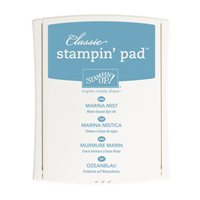
I began with Marina Mist ink and added Night of Navy, using separate sponges every single time. I added a little Daffodil Delight over the reflection area on the water, which turned the blue ink slightly green.
I removed the Post-it-Notes from the skyline and the sun. I lightly sponged in Daffodil Delight over the sun area so it wasn't white.

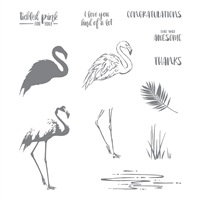
Then the fun part! I stamped the flamingo, water image and sea grass using Basic Black ink and let it dry. I added some black sponging around the bottom border of the card as well. There are lots of layers of ink of this piece of white cardstock so be patient to let them dry or you will just be moving ink around. Once it's dry, use the Basic Black marker to color in the flamingo image so it represents a solid silhouette.
The sponges can be washed out with dish soap and water and left to air dry. You can reuse them in different colors when they are dry, with the exception of the black. I'll use that specifically for that color in the future.
Give it a try! I'd love to see what you come up with. Feel free to email me your creations at [email protected].

Receive exclusive online ordering REWARDS!


Beautiful card, Lisa. Love your sponging. I’m sorry you couldn’t travel this year, that must have been hard. But you’ll be with the group next year!
Hi Laurie! So glad you like the card. Thanks for stopping. I’m looking forward to SU!’s incentive trip to Alaska next summer, that’s for sure! Thanks for the encouragement.
Love, love love this card! So sorry you had to cancel your trip.
Spectacular card!
Thank you so much, Patty!
Hi Linda! Thank you! Thanks, too, for sharing in my ‘missing out’ on the trip feeling. :/ There’s always Alaska! 😀
l really like this card and look forward to trying the technique. how would you use this as a demo at a party or a make and take since you need to let inks dry?
Hi Tracey! Can you email me at [email protected] so I can go into detail with you. Thanks!
Love your card, it is stunning. Praying for your complete recovery, sorry you missed the incentive trip… lifting you up in prayer.
Thank you, Lynn! I appreciate your prayers. I’m doing wonderfully. 😀
This is a beautiful card. I had to leave a comment 🙂
Thank you, Tara! It was so much fun to make. This technique is nearly fool-proof. Hope you’ll give it a try. Thanks for stopping by!