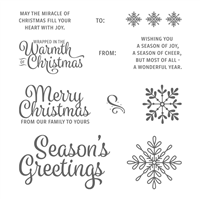
It’s the third and final week in my corner pop up card series. Today’s card features a swing panel that doubles as the front and the inside of the card. The video tutorial is packed with tips to make creating this card easy.
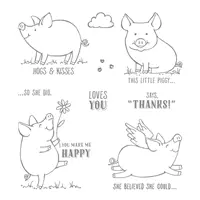
In addition to the “Snowflake Sentiments” card that is featured in the video, I also share another card using the “This Little Piggy” stamp set. This alternate card includes a watercolored image of a happy pig rolling in a mud puddle which is easily created using your Aqua Painter and ink pads. Special thanks to my friend Jill who shared the pig image idea with me!
I’ve included pictures of both cards along, cutting dimensions and a complete list of supplies below.
Whisper White cardstock is used for the base of this card and is cut 8″ x 8″. Score at 4″ in both directions. Score one of the quadrants on an angle as directed in the video.
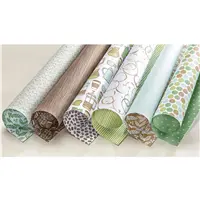
Year of Cheer designer paper is cut 3 3/4″ x 3 3/4″ for the cover. Be sure to mount the designer paper before you die cut your circle.

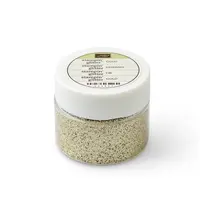
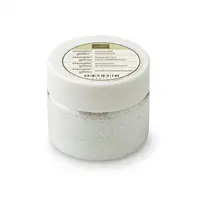
I mixed gold glitter and Dazzling Diamonds glitter for just the right amount of shimmer to accompany the designer paper.

The inside back panel uses Whisper White cardstock cut 3 3/4″ x 3 3/4″.

The lower layer of designer paper is cut 3 3/4″ x 3 3/4″.

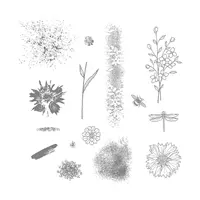
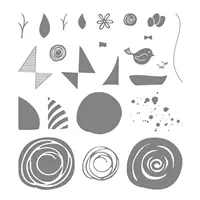
To create the muddy background I used images from Touches of Texture and Swirly Bird stamp sets.

Stamp the pig image using Basic Black Archival ink on Watercolor Paper. Create the muddy look using your Aqua Painter and ink.

The panel on the inside of this card uses the exact same cutting dimensions as the Snowflake Sentiment card.


Thanks Lisa…..Love this card!!
Cindy in Florida
Hi Cindy! Welcome! What part of Florida do you live in?
really good directions. thanks for sharing.
Thank you! It always warms my heart to know that you can easily follow along.
Thanks to you, I have found my 4th card design for Stamp-A-Stack this Friday! Love your idea!
YEAH! So glad to hear that I could inspire you. Enjoy that Stamp-A-Stack this week.
Your card ideas are amazing and your directions are so easy to follow…thank you!
Aww, thank you Maryalice. I’m so glad you found these easy to follow. Enjoy!
Thank you Lisa, wonderful cards as usual. Love the different fold and the glitter idea.
Hi Raye! So glad you like it! Thanks for coming by today!
Love this card thank you for good, clear instructions.
So happy you enjoyed the card and the video, Pauline! Thank you for coming by.
TRES JOLIES
Thanks for coming by to look, Bernath!
Love the piggy card! Is there a way to put some kind of spring/corked wire behind him so he can move?
Hi Sandy! I bet you certainly could. I didn’t attempt it simply because of the moveable opening. I’m not certain it would get caught being open and closed but it’s certainly worth a try. I’m so glad you enjoyed the card. Thanks for stopping by!
Delightful little card – thanks for all the tips and for sharing.
Hi Johanna! I’m so glad you like the card. Thanks for coming by!
Such a beautiful card, no one would guess it was so simple to make. Thanks Lisa, for you creations and inspiration. You are fabulous!!
Hi Rose Ann! I’m thrilled you liked the card. I’m certainly not fabulous but I sure do love what I do! I’m glad it shows. Thanks for stopping by!
Lisa I love this fold!!! These cards are gorgeous!!!!!!
Hugs,
Jo
Thanks so much for the tutorial, Lisa! You did a wonderful job explaining and showing us how to do this! I started out watching your Corner Pop Up Gift Card Holder and am currently working on a 6 x 6 size card! I love how you have variations of this fancy-looking-but-easy-to-make card!!! Thanks again! Hugs, Laura
Hi Laura! Happy to hear that the tutorial was easy for you to follow. It’s so much easier than it looks, isn’t it? 😀 Thanks for coming by to leave me a comment, too!