I’m continuing my videos series on the new Stampin’ Blends with a tutorial on shading small areas. If you missed the first two videos you can find them here:
- Stampin’ Blends Basics – CLICK HERE
- Stampin’ Blends -Shading with Multiple Colors – CLICK HERE
These new alcohol-based markers have two tips, a fine tip and a brush tip. You might think that shading these small areas is impossible but with today’s quick tip I’m confident you can achieve the results you’re looking for.
I’ve included pictures and cutting dimensions for today’s card, along with a complete supply list below.

Cutting Dimensions
- Whisper White cardstock base is cut 5 1/2″ x 8 1/2″
- Whisper White cardstock layer is cut 4″ x 5 1/2″
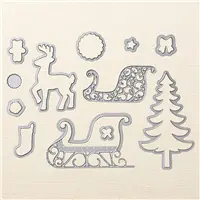
- Images are stamped on Thick Whisper White cardstock
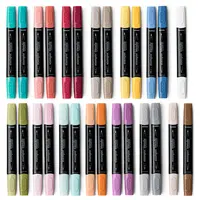
- Stampin’ Blends used: Cherry Cobbler Combo, Old Olive Combo, Crumb Cake Combo, Light Pumpkin Pie, Color Lifter


Blend Life a Pro!

Create images that look professionally colored with the new Stampin’ Blends. These alcohol-based markers are double-sided allowing you to choose the brush or fine-point tip. Each color has a light and dark shade and are available individually or as a combo pack. The separate Color Lifter will allow you to reduce ink coverage to create even deeper shading. There are also Ivory and Bronze markers which are perfect for skin tones!
Not sure how to use alcohol markers? No worries. I’ve got video tutorials covering the basics to shading. Click HERE to search my videos.
View the Stampin’ Blends brochure to see the color selections, pricing and accompanying products.

You can download a free color chart by clicking on the image below. Be sure to print the chart on Thick Whisper White cardstock for best results.


Wonderful card! Love that bit of Pumpkin Pie for extra depth.
Thank you so much, Jen! This was a fun card to create!