Twenty seven years ago today I said “I do” to the most amazing man – affectionately called “Bob the Builder” here on my blog! As the years have passed I’ve fallen in love with him over and over, deeper and deeper and I consider myself the most blessed woman alive!

Bob’s a patient, loving, gentle, a hard worker and incredibly smart (He was the valedictorian of his college graduating class). And let’s not forget his amazing ability to build or fix anything! Hence the nickname. And if that’s not enough, he’s FUN! He’s got a great sense of humor and loves to shop (yeah me!). There isn’t a soul that knows him and doesn’t love him!

He’s been by my side all 19 years of being a Stampin’ Up! demonstrator making him a fantastic business partner. He’s tackled every aspect of my business including wearing a Stampin’ Up! apron and teaching at events. He’s my IT guy, repairman, receptionist, postal carrier, project manager and sounding board.

He’s the kind of father you dream of. He’s handled everything from minor cuts and scraps to pep talks, hormonal meltdowns, teaching Boo to drive, wiping her tears when her heart was broken to providing sound advice. I simply could not blog today without celebrating him – celebrating us – and our amazing twenty seven years of marriage!
Cheers to the Years Tutorial
And since we’re celebrating I felt that this wedding card would be perfect!

I’ve included written instructions below for those of you using a mobile device. I also have a free PDF tutorial available for those that would like to download and save this project for a later day.
Don’t forget to check out my Project PDF Tutorial Library for more project tutorials that feature complete card collections and fancy folds. Click HERE to view the library. All the supplies can be purchased in my online store. I provide generous ordering REWARDS, too! Details on my REWARDS program can be found HERE.
Supplies:
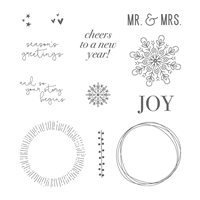
- Stamps – Cheers to the Year (144925 wood, 144928 clear)
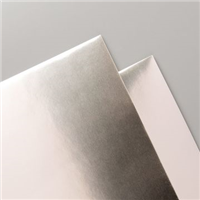
- Paper– Thick Whisper White (140272), Whisper White (100730), Year of Cheer Designer Series Paper (144640), Champagne Foil (144748,) Vellum (101856),
- Ink– Basic Black Archival (140931)
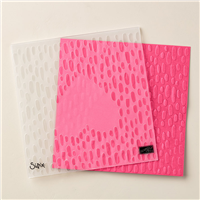
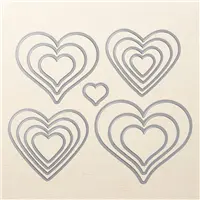
- Other – Sweetheart Textured Impressions Embossing Folder (143705), Big Shot (143263), Sweet & Sassy Framelits (141707), Banner Triple Punch (138292), Pearls Basics Jewels (144219), Stampin’ Dimensionals (104430), Mini Glue Dots (103683), Heat Tool (129053)
Measurements:
- Whisper White Thick (base): 4 ¼ ” x 11”, scored at 5 ½” and folded in half
- Champagne Foil Sheet: 4” x 5 ¼” for die cutting the heart
- Champagne Foil Sheet: scrap
- Designer Paper (starburst pattern): 3 ¾” x 5”
- Whisper White: scrap
- Vellum: 1” x 4
Instructions:
- Adhere the Champagne Foil Sheet to the card base.
- Emboss the designer paper using the Sweetheart Embossing Folder. Be sure the heart is centered. Adhere the designer paper to the card base using Dimensionals.
- Die cut a heart using the Champagne Foil Sheet (4” x 5 ¼”) with the Sweet & Sassy Framelits.
- Die cut a slightly smaller heart using the Sweet & Sassy Framelits from the Whisper White scrap cardstock.
- Stamp the “Mr. & Mrs.” using Basic Black Archival ink onto the Whisper White heart. Let dry. Adhere the heart to the Champagne Foil heart.
- Stamp the greeting using Basic Black Archival ink on the vellum strip. Use the Heat Tool to set and dry the ink so it won’t smudge. Create banner tips on both ends using the Banner Triple Punch.
- Adhere the layered hearts to the card base using Dimensionals.
- Adhere the vellum banner over the top of the hearts as shown using Mini Glue Dots. Place pearls over the Mini Glue Dots to hide them.

Frequent Buyer Card CHANGE
Effective January 1, 2018, my Frequent Buyer Card, which is part of my REWARDS program will reflect a change. The points will be valid for 2 years following their order purchase date. Please remember that this reward is only good on orders placed through Lisa Curcio.
Two New Tutorials Added!
I’ve added two brand new tutorials to the Project PDF Tutorial library. Click on the images for details.
Party Panda Card Collection

Color Me Happy Card Collection

Year End Sales Event – Final Days
Don’t miss out on grabbing your favorite retiring Holiday Catalog products and products that are being discontinued. You can view all those plus the Clearance Rack by clicking on the image below.


FANTASTIC / SO HAPPY FOR YOU /// LOVE IS LIFE
Thank you bunches!
Happy #27 Lisa & Bob, life is so much easier with your best friend by your side. Wishing you another 27+ of happiness.
Oh, you’re definitely right! Thank you!
Happiness is being married to your soul mate. You are so blessed and I wish you many more years together. I know your feeling I was married to “my Bill” for 56 years 3 months and 20 days and after 5 years of him being in heaven. I still love him as if we met yesterday in high school. Happy Anniversary – Together is the nicest place to be….HUGS Helen Blount
I am totally blessed, Helen! He is absolutely my soul mate! Thank you for your well wishes! I know your missing your Bill. 🙁 I’m so sorry! HUGS
Congratulations Lisa and Bob! What a beautiful “Love Story” you have created together! May your story continue for many years to come!
Thank you, Barb!
Congrats to both of you. He’s definitely a keeper!! I’ve heard on your blog about his many wonderful attributes, but I believe these are the first pictures I’ve seen. He’s very handsome. What a great story! I also love the beautiful wedding card you made. That DSP is one of my favorites. Enjoy your special day!
Hi HJ! He is most definitely a keeper! I’m completely blessed by him – and he is handsome, isn’t he? 😀 Thank you for your kind words.
Happy Anniversary……and a beautiful card too! Here is to many more years together. I enjoy your posts! Keep up the great work.
Thank you, Toni!
Congratulations on your 27th Wedding Anniversary! You two are a match made in heaven. Enjoy!
Thank, Teresa!
CONGRATULATIONS to the 27 years you two celebrate. May God bless you two with many more years together!
Thanks so much, Susan!
Lisa and Bob The Builder! Congratulations on achieving this wonderful milestone – 27 years of happy marriage. And thank you Lisa for making this celebration public and allowing your followers to celebrate with you. CONGRATULTIONS. XX Mal, Melbourne, Australia.
Thank you, Mal! I was worried about splattering all this ‘personal stuff’ on my blog but Bob is an amazing attribute to my Stampin’ Up! business and I wanted you all to know about him. I’m so glad you found it enjoyable that I shared it. Thank you for the sweet comment.
HAPPY ANNIVERSARY!!!!
Thank you bunches, Sherry!