We are just days away from Christmas! Most of your gifts have probably been purchased and wrapped, a menu for Christmas has been planned and family and friends are beginning to gather. I’m going out on a limb and assuming you’ve finished your Christmas cards, too! ((smile)) Enjoy these next few days! Don’t let the busy-ness allow you to miss out on hugs, Hallmark Christmas movies and cozy nights sipping hot cocoa. It’s truly a time to relax and reflect!
Once Christmas has passed you may need a few thank you cards. Perhaps there was a family that invited you to share the holiday with them or maybe you received an unexpected gift that deserves a special thank you. If so, then today’s project tutorial is perfect! This project idea is perfect for stationary gifts throughout the year, too. Simply change the designer paper.
I’ve included written instructions below for those of you using a mobile device. I also have a free PDF tutorial available for those that would like to download and save this project for a later day.
Don’t forget to check out my Project PDF Tutorial Library for more project tutorials that feature complete card collections and fancy folds. Click HERE to view the library. All the supplies can be purchased in my online store. I provide generous ordering REWARDS, too! Details on my REWARDS program can be found HERE.

Clutch Full of Thank You

Supplies:
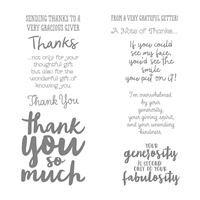
- Stamps– Thankful Thoughts (141522)
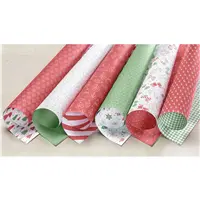
- Paper – Garden Green (102584); Cherry Cobbler (119685); Whisper White (100730); Note Cards & Envelopes, Whisper White (131527); Be Merry Designer Series Paper (144111)
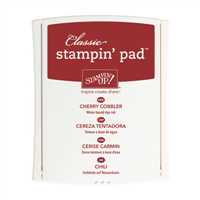
- Ink – Garden Green (126973); Cherry Cobbler (126966)
- Other – Big Shot (143263); Mini Glue Dots (103683); Bone Folder (102300); Layering Ovals Framelits (141706); Clear Faceted Gems (144142); Magnets, 12 pack, l375 Neodymium Ring Magnets
Measurements:
- Designer Paper: 12″ x 12″ sheet for the clutch
- Designer Paper: 4 pieces cut @ 3 1/4″ x 4 3/4″ with a different pattern than the clutch
- Garden Green: scraps
- Cherry Cobbler: scraps
- Whisper White: scraps
Instructions: I recommend practicing the clutch on a scrap piece of designer paper to familiarize yourself with the folds.
Cards
- Fold the note cards in half. Adhere the designer paper to the front of each card.
- Die cut 2 ovals from Garden Green and 2 from Cherry Cobbler scrap cardstock. Die cut 2 slightly smaller ovals using Whisper White scrap cardstock.
- Stamp the word “thanks” on the white scrap ovals, 2 in Cherry Cobbler ink and 2 in Garden Green ink. Adhere the white ovals to each of the colored ovals.
Clutch Purse
- Select which side of the designer paper you would like for the outside of the clutch. Place that side face down.
- Fold one corner up to the opposite corner to create a triangle. Crease the fold with the Bone Folder. Fold up the edge approximately ¾” across the entire width.
- Open up the triangle and turn the paper 180 degrees. Bring the opposite corners of the designer paper up to create a soft triangle. Pinch the center to mark the middle.
- Open the designer paper with the folded horizontal lines facing you.
- Bring the right corner to the center. Fold and crease the edge with the Bone Folder.
- Bring the left corner to the center. Fold and crease the edge with the Bone Folder. This will be the inside of the clutch.
- Create the centerfold into a “mountain fold” (pointing up) with a “valley fold” (pointing down) on either side. This creates a “gusset” for the bottom of the clutch.
- With the fold on the inside, close the clutch with the remaining two triangular corners meeting at the top. Fold each of the corners down to the outside of the clutch, approximately 3”.
- To hold the clutch closed, place a magnet under the fold near the top of the clutch. Adhere it to the designer paper using a Glue Dot on each side of the small round magnet. Repeat on the other side of the purse opening being sure to line up the magnets carefully so the closure lines up evenly.
- Add a Clear Faceted Gem to the front of the clutch as shown. Adhere the triangles on both sides to the purse using a Glue Dot.

Frequent Buyer Card CHANGE
Effective January 1, 2018, my Frequent Buyer Card, which is part of my REWARDS program will reflect a change. The points will be valid for 2 years following their order purchase date. Please remember that this reward is only good on orders placed through Lisa Curcio.
Merry Christmas to each of you! May you have an enjoyable, peaceful holiday. I’ll be back with more inspiration on December 26th!


Not wanting to be picky, but as a former proofreader (from the Dark Ages!), one word often misspelled is ‘stationary’ and ‘stationery.’ ‘Ary’ means ‘fixed, can’t move.’ Ery’ has to do with paper. I ‘letter’ as my test word. Spellcheck does recognize the difference!! Darn ït. So, thought you would want to know. Hope I haven’t offended anyone.
Best wishes for a wonderful new year
Vicki Young
Plano, Texas
Hi Vicki! You haven’t offended me at all! Thank you, thank you! I appreciate the correction, especially since spellcheck missed it. Blessings for a Happy New Year!