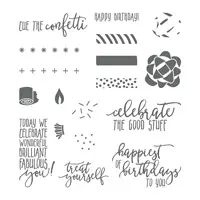
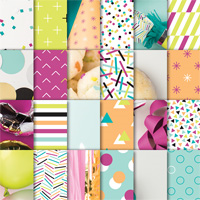
Birthdays are a big deal in our family and we’re gearing up to celebrate Bob the Builder’s next month. Most of you tell me that masculine cards are the most challenging for you to create, and I’d have to agree. I like girly things with bling so creating something that’s geared towards the guys always stretches my creativity. Today’s video project is a box in a card. Yes, you read right. A box IN a card – and it’s perfect for the guys, too! I’m using the Picture Perfect Birthday stamp set and coordinating Picture Perfect Party Designer Paper to create this unique card and gift all-in-one!
I’ve included pictures following the video in this post along with cutting dimensions and a list of supplies. When you place an order in my online store you will receive my generous ordering REWARDS. Details of my REWARDS program can be found HERE. And don’t forget it’s Sale-A-Bration! For every $50 you spend from now through March 31st you can will choose one free Sale-A-Bration product of your choice! And, new this year, $100 level choices, too! Click HERE to view the selection.


Cutting Dimensions
Card Dimensions
- Bermuda Bay cardstock base is cut 5 1/2″ x 8 1/2″
- Score at 4 1/4″ and fold the card base in half
- Line up the cardstock at the 1″ mark on the Stampin’ Trimmer and cut from the top fold to the 2″ mark
- Slide the cardstock to the 3″ mark on the Stampin’ Trimmer and cut from the top fold to the 2″ mark
- Turn the cardstock vertically so the fold is on the left hand side and connect the two cut lines using the Paper Trimmer.
- Flip the cardstock over so the 1″ margin is on the left had side of the card base
- Picture Perfect Party Designer Paper layer is cut 4″ x 5 1/4″
- With the right side of the designer paper facing up, line up the paper at the 2 1/4″ mark on the Stampin’ Trimmer and cut from the top to the 2″ mark
- Slide the paper to the 4 5/8″ mark on the Stampin’ Trimmer and cut to the 2″ mark
- Turn the paper vertically so the cut lines are on the left hand side of the trimmer. Connect the two cut lines using the Stampin’ Trimmer.
- Follow the video directions to cut and assemble
Box Dimensions
- Bermuda Bay cardstock for the lid is cut 3 1/8″ x 3 1/8″
- Score at 1/2″ on all four sides
- Follow the video directions to cut and assemble
- Picture Perfect Designer Paper for the box base is 6″ x6″
- Score at 2″ on all four sides
- I used 27″ of ribbon





Lisa, I would like to make these for Valentines Day but i don’t see the size of the paper for the base of the box. Can you tell me what that is?
Hi Maryann! Thank you so much for pointing this out. I inadvertently left that off the cutting dimensions in this post. I’ve updated it. The designer paper is 6″x6″ which is the exact size of the designer paper stack. Hope that helps!
Absolutely wonderful . I have a card to make for a lady in my Bible Study . This is perfect . Thanks for sharing .
You’re very welcome, Gaeyl! I’m glad you like it enough to CASE!