Monday night I held a Facebook Live event and shared how to create, what I’m calling, a separated window card. I’ve edited the Facebook Live recording for time and content and have included it in this blog post along with a complete tutorial.
If you’re on Facebook I’d love to have you join me Live. Be sure to “like” and “follow” my Facebook page HERE. Since Facebook has recently made some changes, I’m including a picture below so you can accurately follow the page and not miss any of the notifications when I’ll be live.
I’ve included written instructions below for those of you using a mobile device. I also have a free PDF tutorial available for those that would like to download and save this project for a later day.
Don’t forget to check out my Project PDF Tutorial Library for more project tutorials that feature complete card collections and fancy folds. Click HERE to view the library. All the supplies can be purchased in my online store. I provide generous ordering REWARDS, too! Details on my REWARDS program can be found HERE.
Picture Perfect Party – Separated Window Card
All images © 1990-2018 Stampin’ Up!®
Supply List
- Picture Perfect Birthday Photopolymer Stamp Set – 145519
- Melon Mambo Classic Stampin’ Pad – 126948
- Lemon Lime Twist Classic Stampin’ Pad – 144086
- Bermuda Bay Classic Stampin’ Pad – 131171
- Daffodil Delight Classic Stampin’ Pad – 126944
- Tuxedo Black Memento Ink Pad – 132708
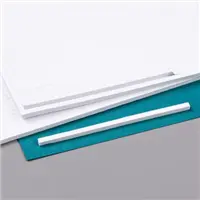
- Whisper White 8-1/2″ X 11″ Cardstock – 100730
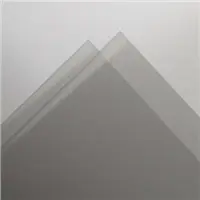
- Window Sheets – 142314
- Stampin’ Trimmer – 126889
- Foam Adhesive Strips – 141825
- Pencil
Measurements
- Whisper White (base) – 5 ½” x 8 ½”, folded in half
- Whisper White (layer) – 4” x 4 ¾”
- Window Sheet – 2” x 4”
Directions
- Stamp the dotted candle base using Melon Mambo ink in the lower left corner of the white layer.
- Stamp the solid candle base using Lemon Lime Twist ink next to the candle in step 1.
- Stamp the striped candle base using Bermuda Bay ink next to the candle in step 2.
- Repeat steps 1-3 until the bottom edge of the white layer has been filled.
- Stamp the flame image using Daffodil Delight ink above each of the candle bases.
- Using the trimmer, cut away 1” from the bottom of the white layer. This will result in two pieces. The top piece will measure 3 ¾” x 4” and the bottom piece will measure 1” x 4”.
- Place the white cardstock pieces on the card base for placement. Using the pencil, make small marks to indicate where the window opening will fall. Stamp the greeting using Memento ink in within the pencil area. Let dry. Carefully erase any pencil marks that will be visible.
- Place adhesive along the edges of both white cardstock pieces. Adhere the window sheet to the edges, being careful that the finished layer will measure 4” x 5 ¼”.
- Adhere the white layer to the card base using Foam Adhesive Strips. Be sure to place a strip in the center of the top portion so the card will not sag.


Free E-Newsletter
Each week I send a free e-newsletter that includes:
- A free project tutorial not shared on my other platforms
- Quick tip video
- Online class information
- Facebook Live event announcements
- Up-to-date promotion details
I’d love to have you join us. Click on the image below to get started.


