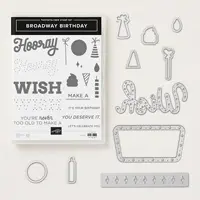
Did you miss getting your hands on the June Paper Pumpkin kit? The kit coordinates with the brand new Broadway Bound Suite, the same suite of products used for today’s birthday bag tutorial. Isn’t the marquee greeting fun?
I’ve included written instructions below as well as a PDF tutorial download if you would like save this project for a later day. You’ll find a complete list of pictured supplies at the end of today’s blog post.
Paper Pumpkin kits include pre-cut supplies to create cards or 3D projects (it’s always a surprise), accessories and several pictured steps. Kits are easy and fun and perfect for the new or seasoned stampers. Use the kit contents exactly as they are designed or put your own spin on them. Not sure you’re creative enough to come up with your alternate ideas? No problem! All my Paper Pumpkin customers receive my Paper Pumpkin Parade – a bundle of tutorials with alternate project ideas each month they subscribe. Paper Pumpkin is only $19.95 per month – shipping is included – and will arrive right to you home. You can read all about Paper Pumpkin and my Paper Pumpkin Parade – and see past month’s sneak peek pictures – by clicking on the image below.

Broadway Bound Birthday Bag
 All images © 1990-2018 Stampin’ Up!®
Supplies:
- Stamps – Broadway Birthday Bundle 148321)
- Paper – Whisper White (100730); Basic Black (121045); Lovely Lipstick (146970); Gold Foil Sheets (132622)
- Stamp Pads – Lovely Lipstick (147140); Memento Black (132708); Whisper White Craft (147277)
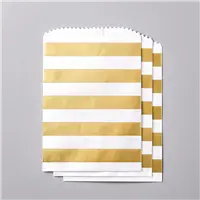
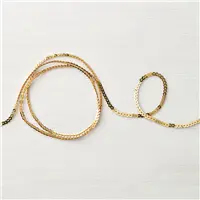
- Misc. – Striped Treat Bags (144255); Embossing Buddy (103083); White Stampin’ Emboss Powder (109132); Heat Tool (129053); Mini Dimensionals (144108); Big Shot (143263); Triple Banner Punch (138292); Classic Label Punch (141491), 5/8” White Polka Dot Tulle Ribbon (146912); Gold Mini Sequin Trim (144128)
Measurements:
- Whisper White: 2 ½” x 4”
- Lovely Lipstick: 2 5/8” x 4 1/8”
- Basic Black: 1 ½” x 5”
- Basic Black: scrap
- Gold Foil: 2 ¼” x 4”
- Tulle Ribbon: 6 ½”
- Sequin Trim: cut 2 @ 2”
Instructions:
- Create banner tips on each end of the Basic Black 1 ½” x 5” piece of cardstock using the Triple Banner Punch. Adhere the banner horizontally to the center of the bag. Adhere the Lovely Lipstick cardstock to the center of the banner. Adhere the Tulle Ribbon across the center of the Lovely Lipstick cardstock. Adhere the Sequin Trim across the center of the Tulle using Mini Dimensionals. Be careful to place the Mini Dimensionals only in the center so they will not be visible.
- Stamp the solid “Hooray” greeting in the center of the Whisper White cardstock using the Lovely Lipstick ink. Stamp the dotted “Hooray” greeting directly over the Lovely Lipstick text. Adhere the Whisper White cardstock over the Lovely Lipstick cardstock at an angle.
- Die cut the marquee frame using the Gold Foil Sheets and the coordinating framelit. Adhere the frame around the “Hooray” using Mini Dimensionals.
- Rub the Embossing Buddy over the Basic Black scrap cardstock. Stamp the greeting “Let’s Celebrate You” using Whisper White craft ink. Immediately sprinkle with white embossing powder. Heat set. Let cool. Punch out the greeting using the Classic Label Punch. Adhere the greeting to the lower left side of the marquee frame using Mini Dimensionals.

Join Me Live on Monday
I love inspiring you! Join me Live on YouTube on Monday, June 25th at 8PM EST – 5PM PST – 6PM MST – 7PM CST. I’ve got a new project to share and I’ll pack in lots of tips to provide you with successful results. If you aren’t already subscribed to my YouTube channel you can do so HERE. If you’re using a desk top version be sure to click the bell icon to receive notifications.

When you spend $25 in product (before tax and shipping) in my online store you’ll receive an invitation to join my “Live with Lisa” event – demonstrations, a bundle of tutorials and product prize giveaways. Place a $50 product order and you’ll receive all that PLUS a free product gift. Check out my REWARDS program by clicking the image below. Be sure to use this month’s host code found above the “shop now” button here on my blog.
Here are the supplies used to create this bag.