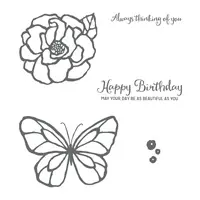
The bold outline images in the Beautiful Day stamp set scream “color me”. I often hear “I don’t color well” and/or “what’s the best way to color bold images”. The Beautiful Day stamp set is the perfect set whether your coloring medium is watercoloring, pencils, markers or alcohol-based markers.. Today’s card and post are all about teaching you how to color like a pro.

- Practice makes perfect. I know, the practice part isn’t “fun” but it’s vital to learning anything. I bet if you look back at your first hand stamped card you’d cringe. I know I cringe when I look back at my first creations. We all get better with practice. The easiest way to practice is to stamp your image on cardstock. Be sure to use the exact same cardstock you would use for your completed card. I often create one or two images for practice before creating my final card.

2.The most common mistake is where to begin placing the color within your image. Start on the edge of the stamped line and blend towards the center. Once the color is laid down, keep dragging the color toward the center.
3. It’s not important to cover the entire image with color. Light areas in the center of an image creates realism. If you look closely at the my butterfly card, you’ll notice the wings are much lighter towards the inside than the outside.
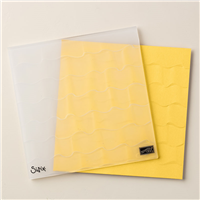
4. Use the right cardstock. For alcohol-based Stampin’ Blends be sure to use Thick Whisper White cardstock. Aqua Painters and Blender Pens work best on Watercolor Paper or Shimmery White cardstock. Markers work well on any of these options. If you’re not using the correct cardstock with your choice of coloring medium, you’ll end up with poor results.
5. Don’t be afraid to experiment by mixing colors. I used a combination of the Stampin’ Blends in Pool Party, Bermuda Bay and Old Olive. If you look closely you can identify where each of those colors are. The end result is a beautiful blend of colors and highlights.
6. Take your time. The entire process of coloring should be relaxing and enjoyable. Rushing through a project will never yield good results. Be patient. Have fun. Take your time.

The alcohol-based Stampin’ Blends markers are affordable, easy to use and always provide professional results. I have several videos teaching you how to use them. These videos are packed with tips and tricks. Take a look!
- View the Stampin’ Blends Basics video HERE
- View how to shade and mix colors using the Stampin’ Blends HERE
- View how to shade in small areas using the Stampin’ Blends HERE
- View the four uses for the Color Lifter video HERE
- View how to create custom accessories using the Stampin’ Blends video HERE
You may be asking “what if I don’t like to color but I love these bold outline images?”. No problem! Consider stamping them in a single color. You can also add Clear Wink of Stella to the white areas for a simple shimmer. Heat embossing is another option and provides a beautiful finish.
Here are the supplies I used to create my card. Click on any of the images to be redirected to my online store. I offer exclusive and generous online ordering REWARDS, too!


One way to improve your cut out images is to use the color that is on the outside of the card to color the edge with the color of that edge. What I mean is that if your cut out image has black at the edge of that image, you need to use black ink to rub on the edge of that image to get rid of any white you see there. If you stamp an image with red edges, you rub red on the outside edge so you won’t see any of the white you will see after you cut it out. I hope that makes sense to you! Thanks for listening!
Hi Donna! This is a great tip and one I’ve shared in a past video here: https://www.youtube.com/watch?v=kzBkENNLj4g Thanks for your comment.