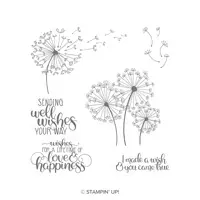
Today’s free tutorial is centered around the Dandelion Wishes stamp set (page 118). I’ve included written instructions for the card below. I also have a free PDF tutorial available for those that would like to download and save this project for a later day.
I grew up in the suburbs of Chicago and summer was always my favorite time of year. We had a pool in our backyard and I’d spend nearly every day swimming with friends and cousins who would frequent our home. After all, we were the place to be on a hot, humid midwest day! My folks BBQ’d most of our summer dinners and while they were grilling I remember my sister and I perusing the yard for a few dandelions. My mom said they were weeds but to us they were the most magical flower. Finding the perfect plump dandelion was like finding gold. The goal was to take one big inhale and see how many of the small seeds you could release – and then we’d make dandelion wishes. Ahhh, the memories of a childhood summer! I’m sure you have some great summertime memories as well. Leave me a comment and share your favorite with me.
Don’t forget to check out my PDF Tutorial Library for more project tutorials that feature complete card collections and fancy folds. Click HERE to view the library. All the supplies can be purchased in my online store.
Dandelion Wishes Tutorial

 All images © 1990-2018 Stampin’ Up!®
Supplies:
- Stamps – Dandelion Wishes (wood 146744, clear 146747)
- Paper – Granny Apple Green (146990), Basic Black (121045), Shimmery White (101910)
- Ink – Granny Apple Green (147095), Versamark (102283)
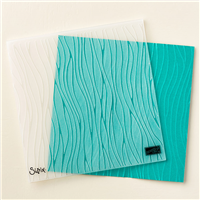
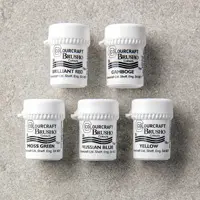
- Other – Heat Tool (129053), Black Embossing Powder (146956), Big Shot (143263), Seaside Embossing Folder (141481), Brusho Crystals (144101), Stampin’ Spritzer (126185), 3/8” Black Shimmer Ribbon (144129), Stampin’ Sponges (141337)
Measurements:
- Granny Apple Green (base): 4 ¼” x 11”, score at 5 ½”
- Basic Black: 3 ¼” x 5 ½”
- Shimmery White: 3” x 5 ½”
- Ribbon: approx. 15”
Instructions:
- Emboss the front of the card base using the embossing folder. Using a wedge of sponge, rub Granny Apple Green ink along the raised texture of the embossed card base.
- Stamp the dandelion and greeting on Shimmery White cardstock using Versamark ink. Sprinkle with black embossing powder. Heat set using the Heat Tool.
- Tap Prussian Blue and Moss Green Brusho crystals on to the Shimmery White cardstock. Use the Stampin’ Spritzer filled with water to spray the crystals. Set aside to dry or use the Heat Tool to speed up the drying process.
- Adhere the stamped layer to the Basic Black cardstock layer. Adhere the layers to the card base.
- Wrap the ribbon around the card front. Tie in a knot to secure.

Embellishment Bundle Giveaway Winner
Congratulations to the following three random winners of the Embellishment Bundle Giveaway! You each have 5 days to contact me to claim your prize. Please email me HERE with your mailing address. Thank you all for your subscriptions to my e-newsletter, YouTube channel and my blog.
- Karen Bongartz
- Monica Lamprecht
- Judy Giddens

New Color Stampin’ Blends Now Available
Twenty-two of the newest colors, are now available. You can choose to purchase them individually or as a combo pack. These alcohol-based markers provide flawless coloring and are super easy to use – whether you like to blend or not! I’ve got an entire video series showing you how to use them:
- View the Stampin’ Blends Basics video HERE
- View how to shade and mix colors using the Stampin’ Blends HERE
- View how to shade in small areas using the Stampin’ Blends HERE
- View the four uses for the Color Lifter video HERE
- View how to create custom accessories using the Stampin’ Blends video HERE

Get an Extra $67.50 in Free Beginning July 1
Is your wish list lengthy? The custom starter kit is the perfect way to get your choice of $125 in products for only $99 – with free shipping! But during July the kit gets even sweeter! Add your choice of a color family 10-pack of ink pads for ABSOLUTELY FREE! That’s another $67.50 savings! And, did you know that your custom starter kit allows you to shop at a 20% discount through January 31, 2019?! it sure does!
Get more details about why the custom starter kit is the #1 way to save on your paper crafting supplies and have even more fun HERE.(Be sure to read and scroll all the way down). This special offer is valid July 1 – 31 only!


Designer Paper Sale Begins July 1
The “Buy 3, Get 1 Free” designer paper sale last year was so popular that Stampin’ Up! is bringing it back for the entire month of July! Purchase any 3 designer papers on the list and select a 4th pack for FREE!

Here are the supplies I used to create this card. Click on any of the images to be redirected to my online store.


Lisa,
Your card is beautiful. We did the same thing with dandelions. My memory is of catching lightning bugs (fireflies). At dusk, they’d come out and we’d run around catching them and putting them into a jar. We’d marvel at the light they’d give off in that jar. Then we’d set them all free to be caught another night.
Ohh, Sue, I remember catching lightning bugs as well! What wonderful memories of summers gone by! That are truly one amazing creature, aren’t they? Thanks for taking the time to stop by and tell me about your summer memory!
I grew up in rural Iowa and childhood memories of both catching fireflies in a jar on a summer night, and finding white fluffy dandelions to blow on and watch the parts float in the air—imagine I was helping spread the seeds to grow more dandelions, but that wasn’t a concern to me as a child. And I liked the bright yellow dandelions also–would often pick a bouquet to bring to my mom. And we used to make necklaces from the stems- putting the end of one into one end of the other, etc. So I was excited to see this dandelion set–think maybe it’s gotten a bad rap seen only as a weed (I got the same message from my parents as you, Lisa).
YES, Joan! Lightning bugs were absolutely a favorite thing to do. We always let them go so we could catch them again on another night. I have the perfect visual of the beautiful dandelion bouquet you picked for your mom. We never made necklaces from the stem but what a great idea! I’m looking forward to the day that I’ll be a grandma and I’ll definitely remember doing that with my grandchildren some day. Thank you for sharing!
Beautiful card Lisa. I love your videos. You have a great way of teaching.
Hi Cheryl! I’m so glad you’ve come by today to take a look. Thank you for your kind words!
Hey Lisa, Coming from the “burbs” of CLE, i,too, remember lightning bugs and dandelions! I also loved it when it would rain and we would all go out and run in the rain. What fun it was!!
Love your card!!!
Hello, Linda! I’m sure missing you, friend! I hope to see you on the Stampin’ Up! cruise to Alaska in a few weeks. Lightning bugs and dandelions – summer wouldn’t be the same without them! Thanks for stopping by.
Beautiful card! Thank you for the details.
So glad you like it, Daria! Hope you downloaded or copied your free tutorial.