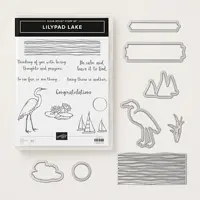
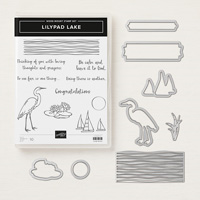
Today’s card is a great example to why outline stamp images are so versatile. The heron and lily pad images from the Lilypad Lake stamp set are intended to be colored in but I saw a possibility of using them as silhouettes or shadows. These silhouettes are easy to create with a black marker but to make them stand out you need a striking background.

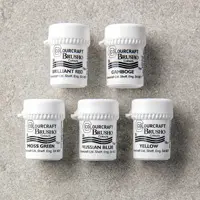
I began by creating a square opening in the upper center of Whisper white cardstock layer (4″ x5 1/4″) using the Layering Squares Framelits. I used a 3 1/2″ x 3 1/2″ piece of Shimmery White cardstock and taped it down to a protected work surface using low tack Frog Tape. I wet the cardstock using my Aqua Painter then sprinkled on the blue and yellow Brusho watercolor crystals. Using the Aqua Painter like a paint brush, I washed the Brusho crystals into the cardstock to create a smooth graduation of color. You’ll notice that I used more yellow Brusho at the top of the cardstock versus the bottom. The hardest part of this card is waiting for the cardstock to dry. I’ll admit I was a bit impatient so I used my Heat Tool to speed up the process.
Using a pencil, I marked where the opening of the square would fall onto the Brusho background then stamped the lily pad image. I colored in the entire lily pad image using the Basic Black Stampin’ Write marker.

The heron wast stamped on a scrap piece of Whisper White cardstock and using the same process as the lily pad, I colored in the entire image with the Basic Black Stampin’ Write marker. The coordinating Lakeside Framelits die cut the heron – no fussy cutting! The grass is a die in the same framelits which I used on Basic Black cardstock then adhered with Mini Dimensionals. Aren’t dies a wonderful thing?!

I adhered the white layer using Foam Adhesive Strips. If you haven’t given this product a try you’re missing out! They are the perfect depth for creating what I call a “shadow box layer”. The double-sided strips are pre-cut and like a Dimensional, have a paper backing that is easily removed. What would have taken 25 or more Dimensionals for this card was easily accomplished with a few Foam Adhesive Strips – and in a fraction of time. The even coverage of the Foam Adhesive Strips means your card is perfectly balanced and will stand up to mailing.
And if the images and coordinating dies aren’t enough, the greetings in the Lilypad Lake stamp set contain unique greetings with a fun font.
Embellishment Bundle Giveaway
Whether you’re new to stamping or a seasoned stamper you’ll be inspired by what I share. I’m drumming up new YouTube, newsletter and blog subscribers and I’d love for you to join us. Three random winners will be chosen on Friday, June 29, 2018 and will be announced here on my blog and on my Facebook page HERE. This is a free giveaway so don’t forget to share the opportunity with your paper crafting friends! Click on the image below to enter. This giveaway is only valid for U.S. residents. Stampin’ Up! demonstrators are excluded.

Here are the supplies I used to create my card. Click on any of the images to be redirected to my online store. I offer exclusive and generous online ordering REWARDS, too!