This handmade card using a unique coloring technique that uses a pencil eraser. This card also features the Garden Impression Designer Paper and the Enjoy Life stamp set.
Last Monday night I held a YouTube Live event and shared this simple, yet beautiful card. Although the stamp set contains all solid images I found a way to add a little extra color to the silhouette floral image. And the Detailed Trio Punch adds the perfect accent to the upper right corner. If you missed my tips on the new Detailed Trio Punch you can view it HERE.
I demonstrated the first card shown below using a pencil eraser to add color. The second card has a different layout using the same products primarily and was an experiment. I used the Stampin’ Write markers to add color to the flowers and my experiment proved worthy. Two dye-based products don’t interact well which results is a muddied color. If you’re super careful you can achieve decent results but the card you see below was my third attempt. The eraser provides quick, beautiful results so I’d suggest giving that a try! I’d love to know which one of these cards is your favorite. Leave me a comment.
I’ve packed in lots of tips about this card including a close up look at the Garden Impressions Designer Paper Stack (48 sheets!). Don’t miss my trimming tip in the video, too. Now’s the perfect time to stock up on designer paper, too. Stampin’ Up! is having a Buy 3, Get 1 Free sale! Details below.
If you aren’t already subscribed to my YouTube Channel, I’d love to have you follow me. If you’re using a desk top computer, click the bell icon to receive notifications of when I’m live. Click HERE to subscribe.
I’ve included pictures, cutting dimensions and supplies below. Be sure to scroll down to see them.
This card uses the pencil eraser to add color.
Cutting Dimensions
- Night of Navy cardstock base is cut 5 1/2″ x 8 1/2″
- Whisper White cardstock layer is cut 4″ x 5 1/4″
- Garden Impression Designer Paper is cut 1″ x 5 12″ *Note my tip in the video – cut it longer and trim


This card was entered in the Simon Says: Anything Goes Challenge

This card uses the Stampin’ Write Markers and a different layout.
Cutting Dimensions
- Night of Navy cardstock base is cut 5 1/2″ x 8 1/2″
- Whisper White cardstock layer is cut 4″ x 5 1/4″
- Night of Navy cardstock layer is cut 2″ x 4 1/4″
- Whisper White cardstock image layer is cut 1 3/4″ x 4″
- So Saffron cardstock strip is cut 1/2″ x 1 3/4″
- Garden Impressions Designer Paper is cut 1/2″ x 1 3/4″ *Note my tip in the video – cut it longer and trim
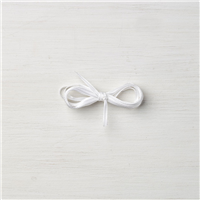
- I used 8″ of ribbon for the bow


Designer Paper Sale
The “Buy 3, Get 1 Free” designer paper sale last year was so popular that Stampin’ Up! is bringing it back for the entire month of July! Purchase any 3 designer papers on the list and select a 4th pack for FREE!

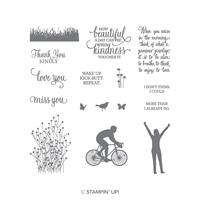
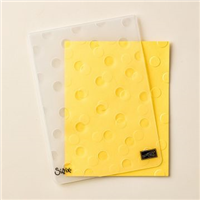
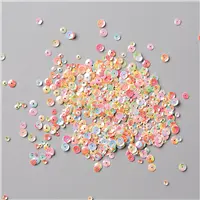
Here are the supplies I used to create my card. Click on any of the images to be redirected to my online store. I offer exclusive and generous online ordering REWARDS, too!
Customize It and Add $67.50 for Free
Is your wish list lengthy? The custom starter kit is the perfect way to get your choice of $125 in products for only $99 – with free shipping! But during July the kit gets even sweeter! Add your choice of a color family 10-pack of ink pads for ABSOLUTELY FREE! That’s another $67.50 savings! And, did you know that your custom starter kit allows you to shop at a 20% discount through January 31, 2019?! it sure does!
Get more details about why the custom starter kit is the #1 way to save on your paper crafting supplies and have even more fun HERE.(Be sure to read and scroll all the way down). This special offer is valid July 1 – 31 only!


Both are beautiful cards, Lisa. If I have to choose one, it would be the first one. Love the colors and layout of both, as well as your creative way of making the “flowers”. Very clever! Enjoy your day!
Hi Hilda! I’m so glad that you liked the cards. Thanks for stopping by!
Love both cards but my favorite is the first one… Thanks for the eraser tip….
Hi Bernice! That eraser tip makes perfect small circles, even polka dots. I hope you’ll give it a try. Thanks for coming by to watch and for your comment.
Both cards are beautiful, and not time consuming. Thank you!
Hi Kathy! Thanks for coming by to take a look. So glad you like them!
Hi Lisa, I have been following your blog for quite some time now & really enjoy all your tips & design ideas. Your cards today were simple & easy to do……..I like both designs. You said that you would be glad to send out a complimentary catalogue. My sister has shown some interest in trying some stamping & does not have a demonstrator in her area. Would it be possible to send her a catalogue. I can provide her address in an email if this is possible. Thanks
Hi Karen! I’d be happy to send your sister a catalog if she’s interested in Stampin’ Up! products. Please email me her full name, mailing address and email address to [email protected]
I enjoyed the video and hope to try this technique. Both cards are lovely but by a very small margin I think I like the embossed card best.
Hi Rita! Thanks for your comment indicating which is your favorite – even if by a small margin.
Your cards are so beautiful and pretty !!! Thank you so much for playing along with us at the Simon Says Stamp Wednesday Challenge! /Karin
Thanks for coming by to comment, Karin!
Love the cards! They would also be great for a sympathy card. Thanks & thanks for your enthusiasm
Hi Bonnie! I’m so glad you like the cards. Thanks for coming by to watch – and thank you for your online order!
Beautiful cards! Thank you for the video and the tips you shared.
I’m so glad you enjoyed the cards, Daria. Thank you for watching.