Like most of you, I mass produce my Christmas cards each year to make the task more manageable. That was until my mom and sister were ‘comparing’ their cards one year, realizing they had received the exact same card. As the years unfolded I decided to make a few “special” cards for my immediate family. If you have a desire to create a special card for someone on your Christmas card list then today’s z-fold card is just for you!
Although this card features a fancy fold it is not difficult to create. I’ll show you how to up-cycle a die cut layer to use as part of the card plus I’ve packed the video with tips to help you along the way. You can find the cutting dimensions, pictures and a complete supply list below. Be sure to scroll down past the video to see them.
November’s Studio Stamps in the Mail
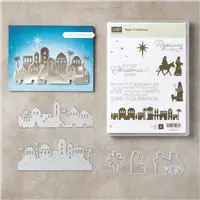
Ordering for this month’s Studio Stamps in the Mail is underway and will continue through Sunday, November 19th. This month’s edition includes the Snowflake Sentiments stamp set, Foil Snowflakes, the Winter Wonder Embossing Folder and pre-cut supplies to make 8 cards. There are 2 cards of each of 4 different designs and one is a fancy fold! All orders include accessories, envelopes, a video and PDF tutorial, making it easy for you to stamp along with me from home. Click on the image below to see the products and the cards included.

Card front view
I added a ribbon “pull” to the top layer after these pictures were taken. The instructions on how to add it are included in the video.

Ariel view

Open view
 Left inside panel

Right inside panel

Cutting Dimensions
- Whisper White Thick cardstock base is cut 4 1/4″ x 11″, scored at 5 1/2″ and folded in half
- Basic Black cardstock was used for the “z-fold” and cut 2 1/2″ x 10 and scored at 4″ and 8″
- Whisper White cardstock inside panels were cut 2 1/4″ x 3 3/4″. You will need 2.
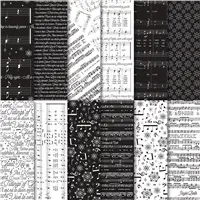
- Merry Music Specialty Designer Series paper was cut 4″ x 5 1/4″
Spotlight with Lisa – Thursday!
Mark your calendar for Thursday, November 16th at 8PM EST – 5PM PST – 6PM MST – 7PM CST for a live Facebook demonstration called “Spotlight with Lisa“. During this event I will share a technique, lots of tips and interactive fun. Plan to join me – it’s free! Click HERE to “like” my Facebook page so you don’t miss the reminders and notifications.


Beautiful card Lisa!
I’m so glad you like it, Theresa! Thanks for coming by today to watch and comment. I appreciate the feedback!
Love your card and style Lisa. Thank you for Sharing your beautiful projects with us.
Marina
Aww, thank you, Marina! I’m so glad you enjoyed the card. Thanks for coming by!
Beautiful classy card Lisa
Thank you, Diane!