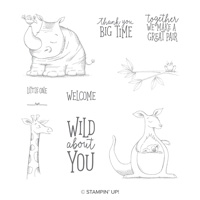
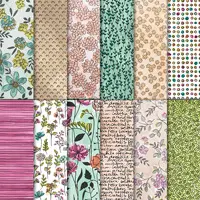
Today’s project and tutorial features the new Animal Outing stamp set. This adorable stamp set (page 27) includes images for a kangaroo, koala, rhino, giraffe and four greetings with creative text. This stamp set caught my eye because of their sweet expressions. This card uses the Stampin’ Blends to provide color, very much like a marker, with little to no shading. These alcohol-based markers will provide flawless coverage without the harsh lines that markers create. And don’t miss the grass and flowers that were added using the Blends! They’re the perfect touch to this floral designer paper.
I’ve included written instructions for today’s project below. I also have a free PDF tutorial available for those that would like to download and save this project for a later day. Don’t forget to check out my PDF Tutorial Library for more project tutorials that feature complete card collections and fancy folds. Click HERE to view the library. All the supplies can be purchased in my online store. I provide generous ordering REWARDS, too! Details on my REWARDS program can be found HERE.
 All images © 1990-2018 Stampin’ Up!®
Supplies:
- Stamps – Animal Outing – (wood 146597, clear 146600)
- Paper – Whisper White (100730); Berry Burst (144243); Share What You Love Designer Series Paper (DSP) (146296)
- Ink – Memento Black (132708)
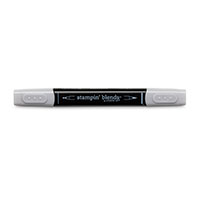
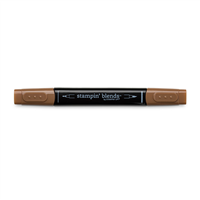
- Other –Stampin’ Blends – Ivory (144606); Light Crumb Cake (144582); Smoky Slate Light (145054); Smoky Slate Dark (145055); Bronze (144607); Old Olive Light (144574); Daffodil Delight Light (144586); Rich Razzleberry Light (144584); Banner Triple Punch (138292); Detailed Trio Punch (146320); 5/8” White Polka Dot Tulle Ribbon (146912); Stampin’ Dimensionals (104430)
Measurements:
- Whisper White (base): 4 ¼” x 11”, scored at 5 ½” and folded
- Whisper White (image): 3” x 3”
- Berry Burst (strip): 2” x 5 ¼”
- Designer Paper: 4” x 5 ¼”
- Ribbon: 11”
Instructions:
- Corner round all the corners on the Whisper White image layer and the designer paper using the Detailed Trio Punch.
- Adhere the designer paper to the card base.
- Using the Banner Triple Punch, create a banner tip on one end of the Berry Burst cardstock strip. Tie the ribbon around the lower section of the banner, tying in a knot in the front. Adhere the banner to the center of the card base as shown.
- Stamp the kangaroo image using Memento ink on the Whisper White image layer. Stamp the greeting below the image using Memento ink. Color in the image using the Stampin’ Blends.
- Color and create an area of grass under the kangaroo image using the Light Old Olive Stampin’ Blends. Draw in flower stems to the right of the kangaroo image using the Light Old Olive Stampin’ Blends. Add circles to the top of the stems (to represent flower buds) using the Light Daffodil Delight and the Light Rich Razzleberry Stampin’ Blends.
- Adhere the image to the upper center of the banner using Dimensionals.

Free Stamps in the Mail Kit
Stamps in the Mail (SITM) is a way for you to stamp with me from home. There is NO monthly obligation and this is not a club. The June kit includes free pre-cut supplies to make 8 cards (2 each of 4 designs) using the brand new Varied Vases Bundle (stamp set and Vase Builder Punch). Receive this free card kit with any $50 product purchase, using the exclusive SITM host code between June 13 – June 16. More details on SITM can be found by clicking on the image below.

Here are the supplies used to create this card. Click on any of the images to be redirected to my online store. I offer exclusive and generous online ordering REWARDS, too!


Thank you Lisa for yet another useful PDF for us crafters to save for future use. You are so generous with these PDFs and I find them such an inspiration for starters for stamp sets. :O)